
Microsoft Visual Studio Code is a general purpose programming IDE that, thanks to plugins, can be used to develop in several languages, and in this case, for several devices.
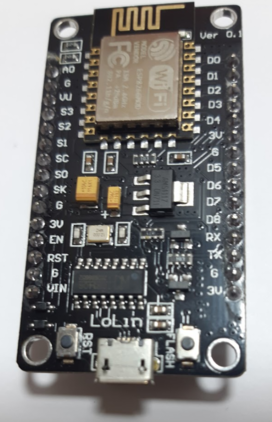
NodeMCU is a device that, using a ESP8266, can be programmed using USB, and easily connect several IoT devices (like temperature and humidity sensors) and connect to a WiFi network to send data using the standard TCP or UDP protocol.
In this post, we will be configuring VSCode (we will assume it is already installed in the computer) to be able to upload an small C program to the device.
Start the IDE
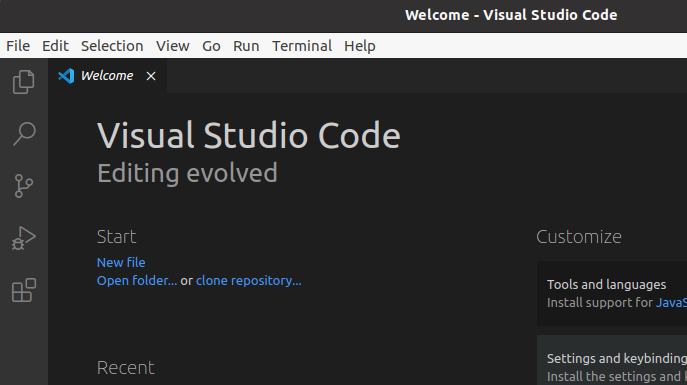
Start VSCode. A window similar to this one should open:
Install the Platformio Extension
The base installation of VSCode does not include support for IoT devices. We will use the Platformio Extension for VSCode for this.
To install it, select the extensions icon in the left sidebar of the VSCode window and in the editbox for searching Extensions, write "platformio".
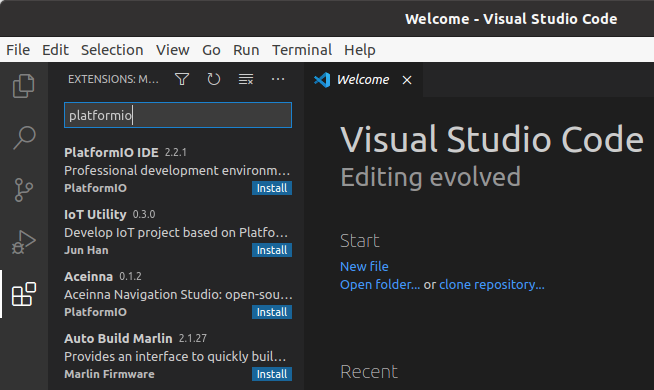
Click on the install button for, in this case, the first result.

To ensure the extension will be working properly, restart VSCode
Create a new ESP8266 project
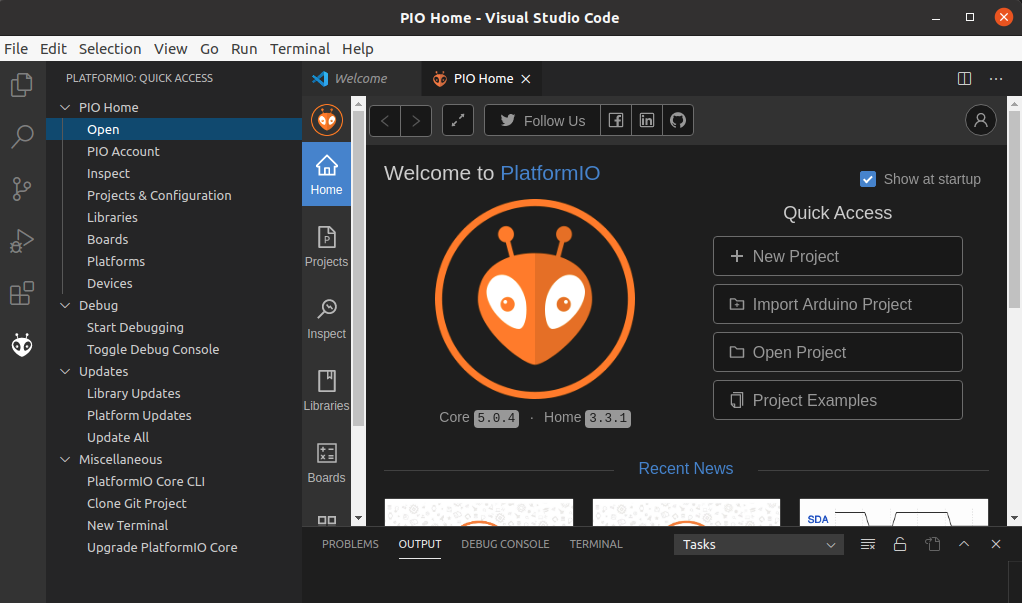
After restarting, a new icon in the left sidebar should appear, this is our new extension. Click on it and then "open" to start IDE.
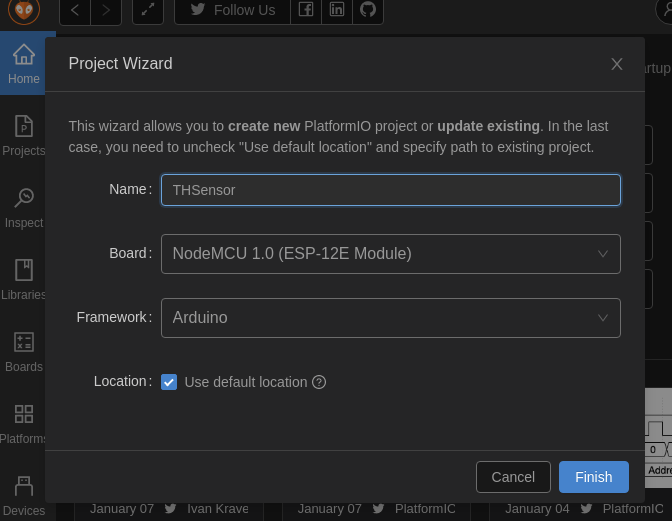
Click on "New Project". A popup window will ask you for the project data. In this post, we will create a project named "THSensor", board will be NodeMCU 1.0.
Also, you could choose a folder for the project (I'm leaving it as default).
The first time a project is created, an Internet connection is required as PlatformIO needs some setup to be done, wait until it finishes preparing the environment and your project is opened in the main window.
You can now go to the left tree window, expand src and double click on main.cpp.
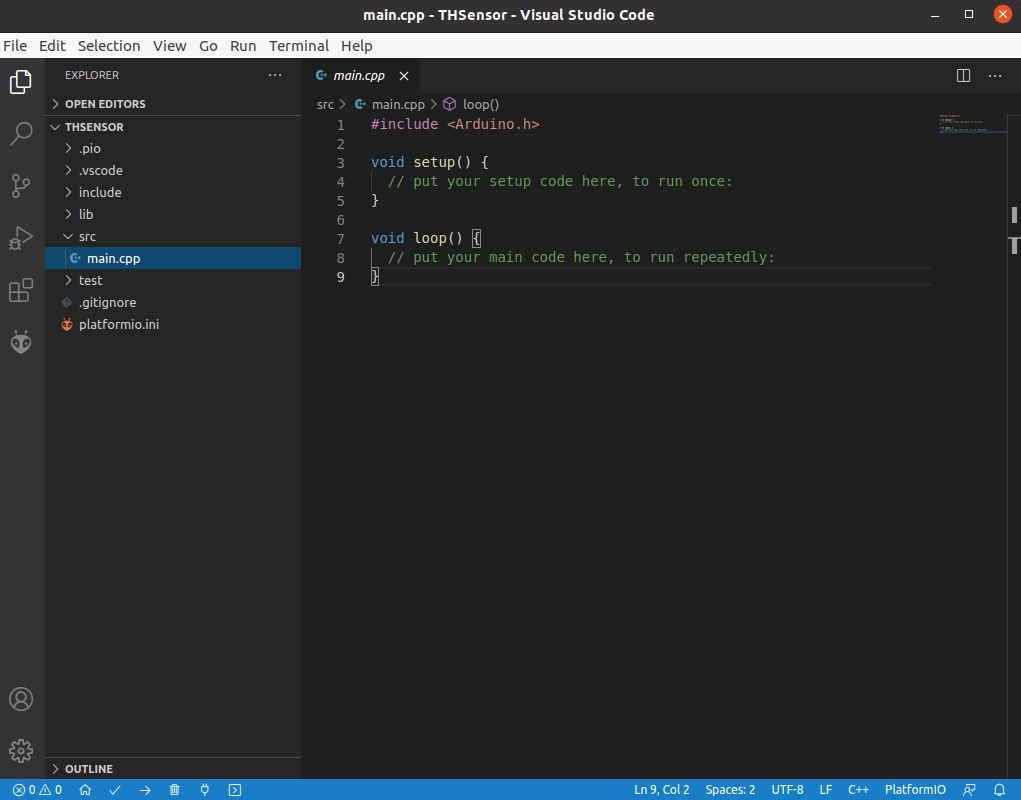
We got a scaffoldmain where we can code whatever we want.
Code your program
Now we're ready to code our C program. As an example, we will be coding a program that will be blinking one of the NodeMCU leds every 5 seconds and keep it turned on for 500ms.
Change your main.cpp to be like this:
#include <Arduino.h>

#define LED D4

void setup() {
  Serial.begin(74880);
  pinMode(LED, OUTPUT);
}

void loop() {
  //Turn off the led
  Serial.println("OFF\r\n");
  digitalWrite(LED, HIGH);

  //Wait for 5 seconds
  delay(5000);

  //Turn on the led
  Serial.println("ON\r\n");
  digitalWrite(LED, LOW);

  //Leave it on for 500ms
  delay(500);
}
Enable our Linux user to be able to use the serial ports
Communitation to the NodeMCU uses a system device that is configured when the device is connected. For being able to upload code to the device (or files) we need to ensure our user is in the "dialout" group. You can check issuing the following command from a terminal:
id
If in the response groups "dialout" group is not listed, add your user to it using the following command:
sudo usermod -a -G dialout $USER
You will need to close your current session and log in again (check with the id command that your user is now in the dialout group).
In my case (using Ubuntu 20.04.1 LTS) I had to restart the user.slice service so that GDM is restarted and my user groups gets refreshed
sudo systemctl restart user.slice
Configure monitor speed
NodeMCU defaults to 74880 bps. To be able to use the serial monitor and see log messages, we need to change the default 9600 that PlatformIO has to this value.
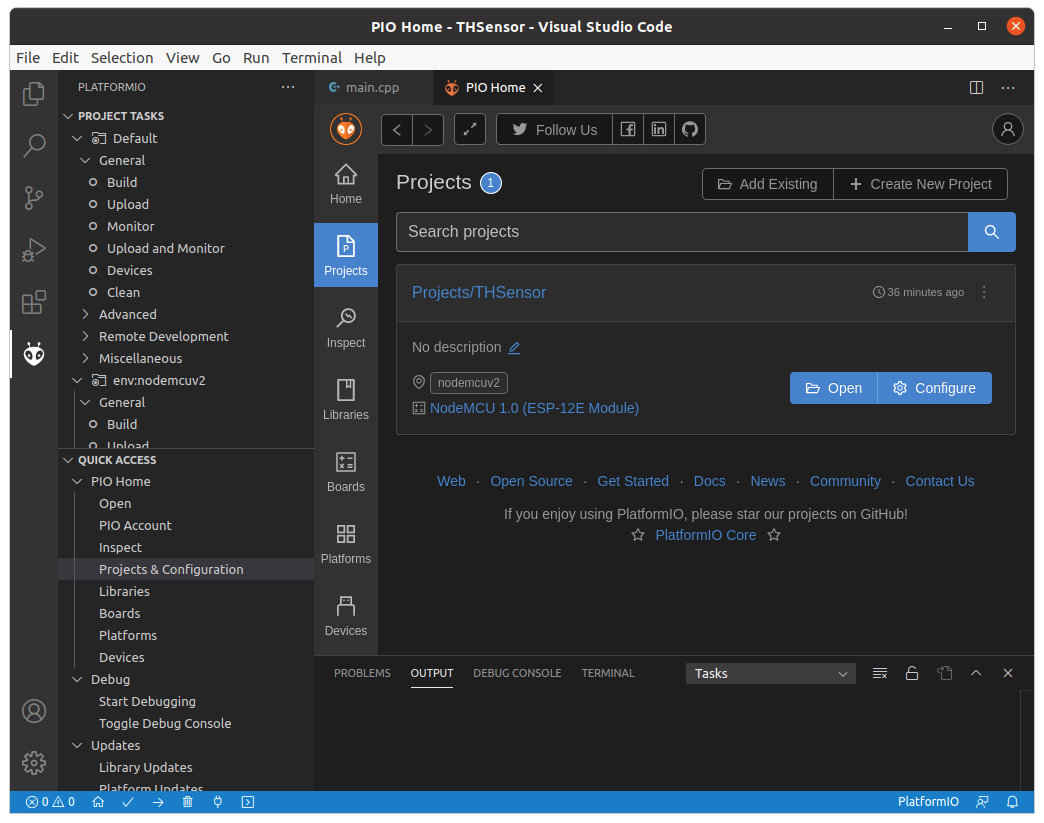
Click on the PlatformIO icon in the left sidebar, then, in "Quick Access", click "Projects & Configuration". Our project will be listed, click on "Configure":
Then, click on the 3 dots and select "Common configuration"
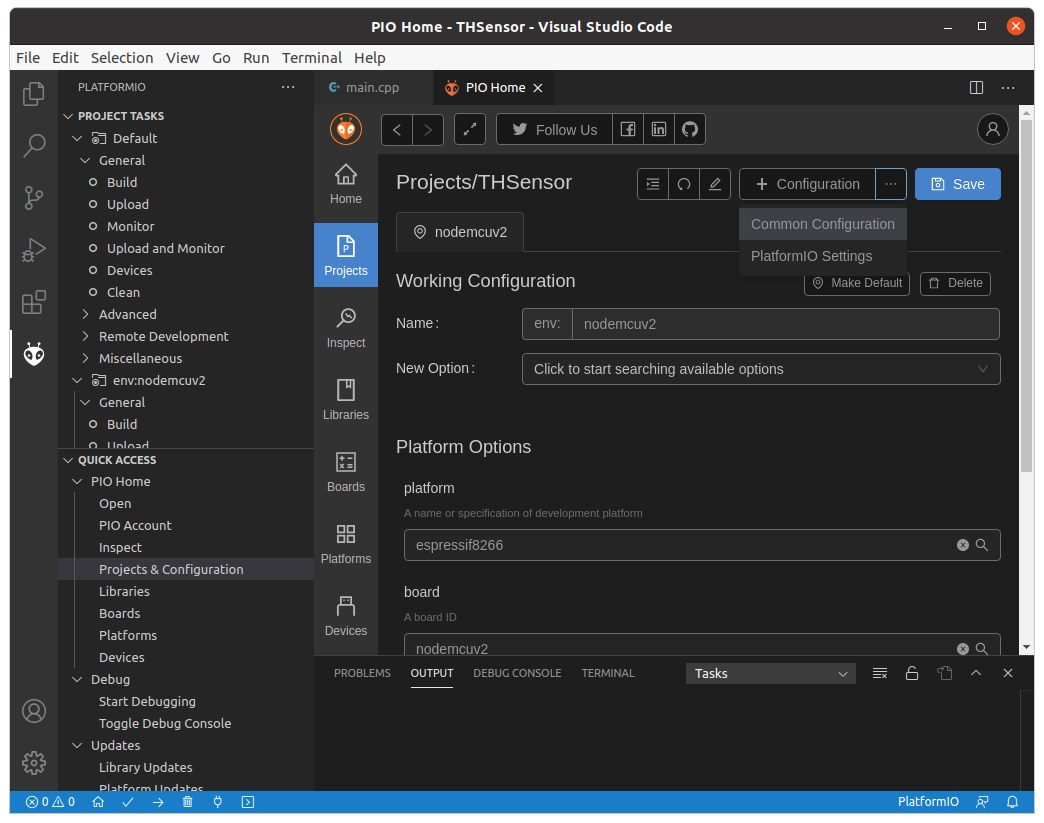
In the "New Option" editbox, type "monitor_speed" and set to 74880

Click Save (accept the warning regarding the configuration that will be overwritten).
Connect the NodeMCU
Connect a USB cable to the NodeMCU micro USB port and to your computer port. The NodeMCU will blink briefly and in your computer a new USB should be reported:
dmesg | tail
[ 4782.927702] usb 3-4: new full-speed USB device number 9 using xhci_hcd
[ 4783.076786] usb 3-4: New USB device found, idVendor=1a86, idProduct=7523, bcdDevice= 2.54
[ 4783.076790] usb 3-4: New USB device strings: Mfr=0, Product=2, SerialNumber=0
[ 4783.076793] usb 3-4: Product: USB2.0-Serial
[ 4783.078991] ch341 3-4:1.0: ch341-uart converter detected
[ 4783.079448] usb 3-4: ch341-uart converter now attached to ttyUSB0
The NodeMCU is ready on /dev/ttyUSB0
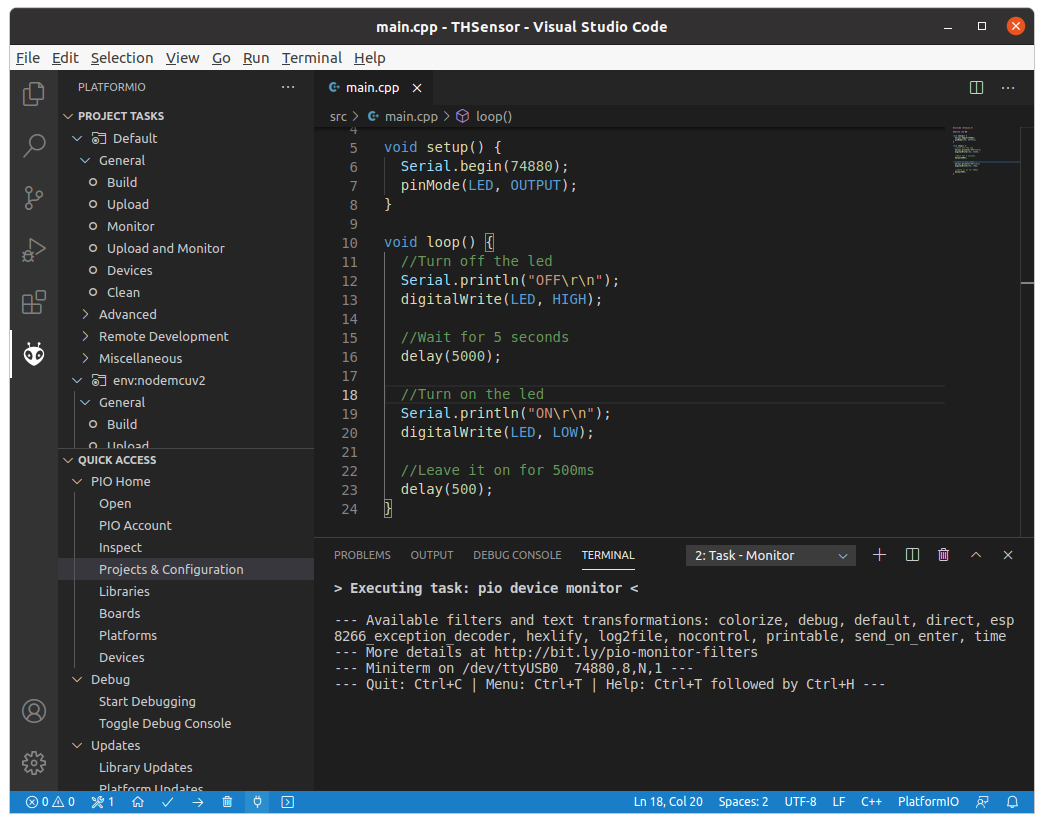
Click on the Serial Monitor icon in VSCode bottom icon bar (looks like an electrical plug). A task will be started in VSCode that will show a window like this one:
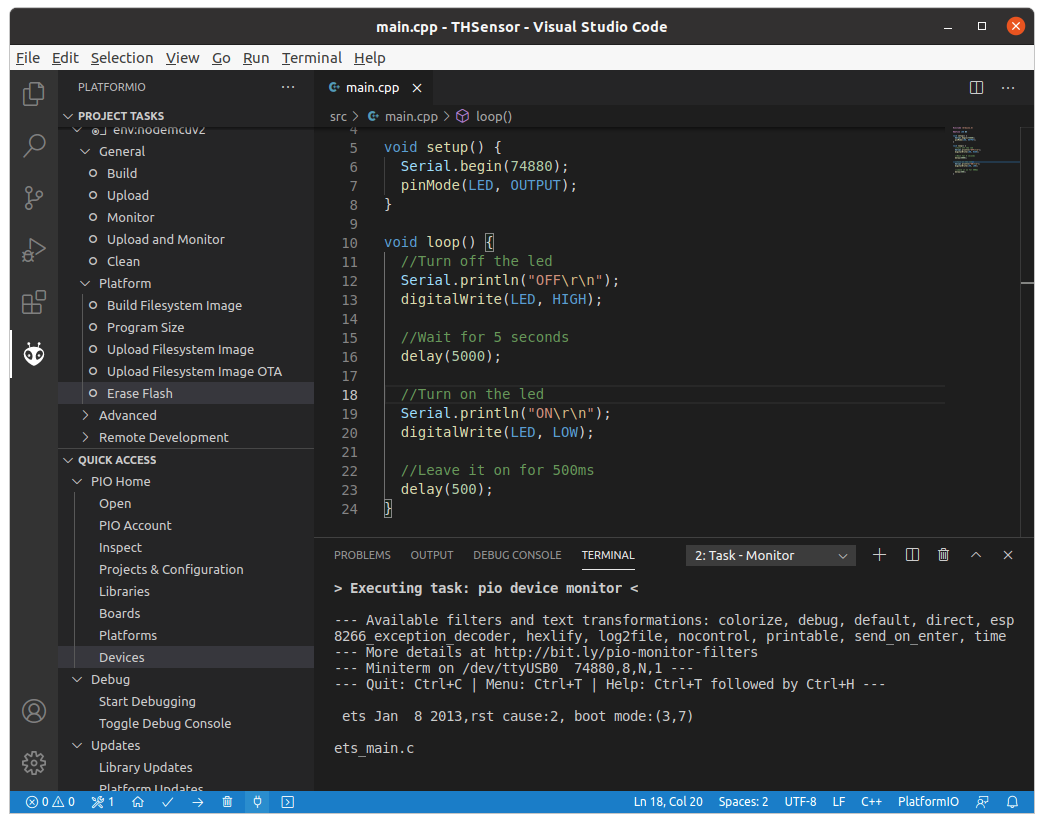
Now, hit the "RST" button in the NodeMCU, the serial monitor will receive the startup log information from the NodeMCU similar to this one:
Compile and upload our program
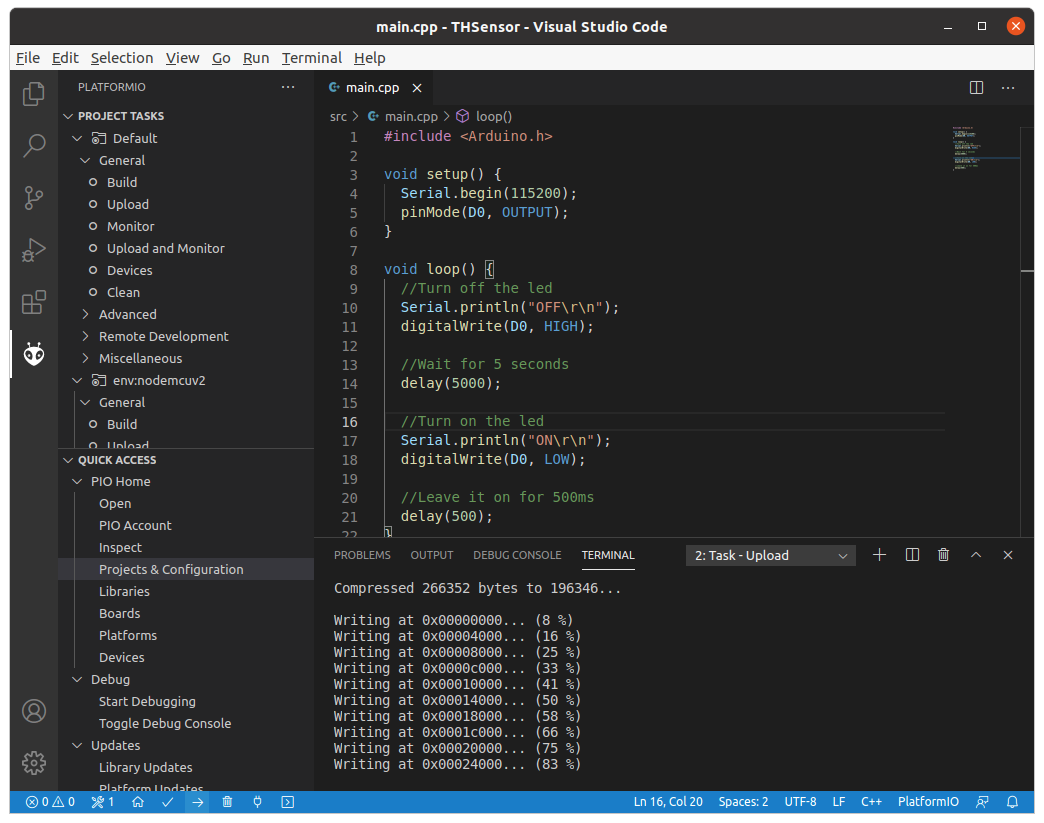
We're ready to compile and upload our test program. Click on the "->" icon to compile and upload our test program.
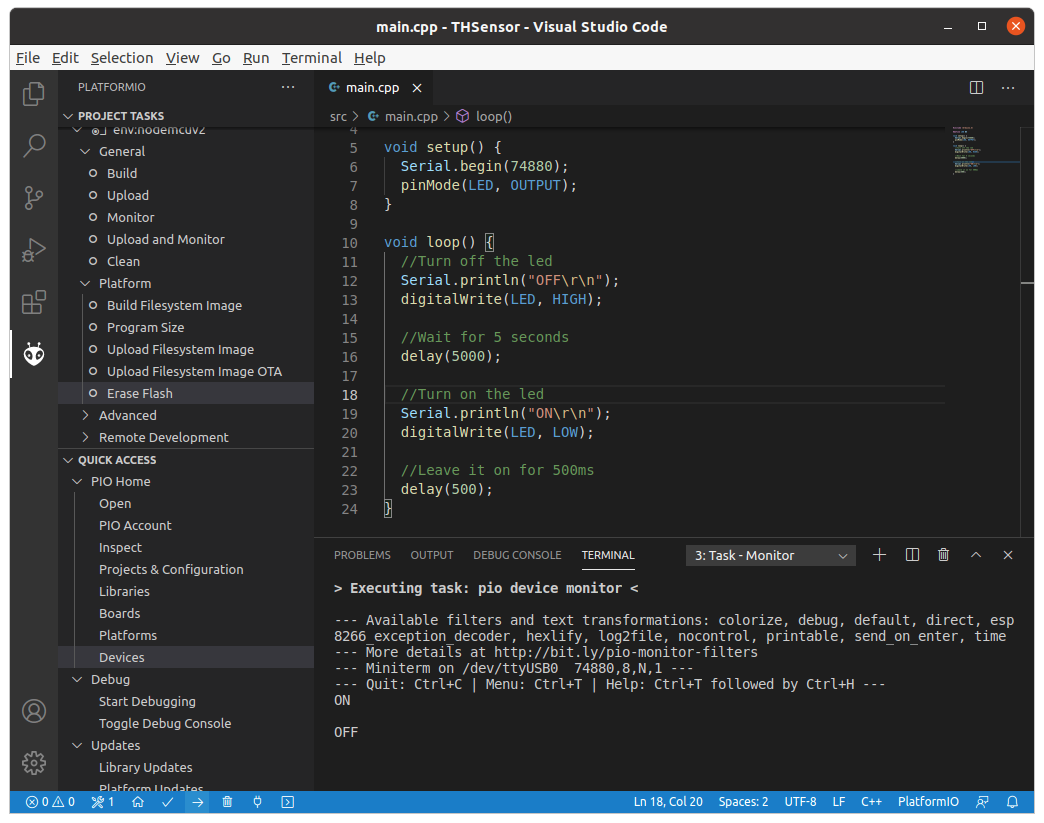
The led should blink as we programmed and the serial monitor will show "ON" and "OFF" strings with the defined cadence.
We've got the basics here. Now we can program more usefull tasks in other little NodeMCU.